Reading Plan Templates
The Reading Plan Templates workbook gives teachers a structured place to enter class dates, lesson titles, and readings. The admin configures it once per plan; the teacher fills it in. A built-in Steady Word Teacher Tools menu handles formatting, date cleanup, and validation before anything goes to Plan Builder.
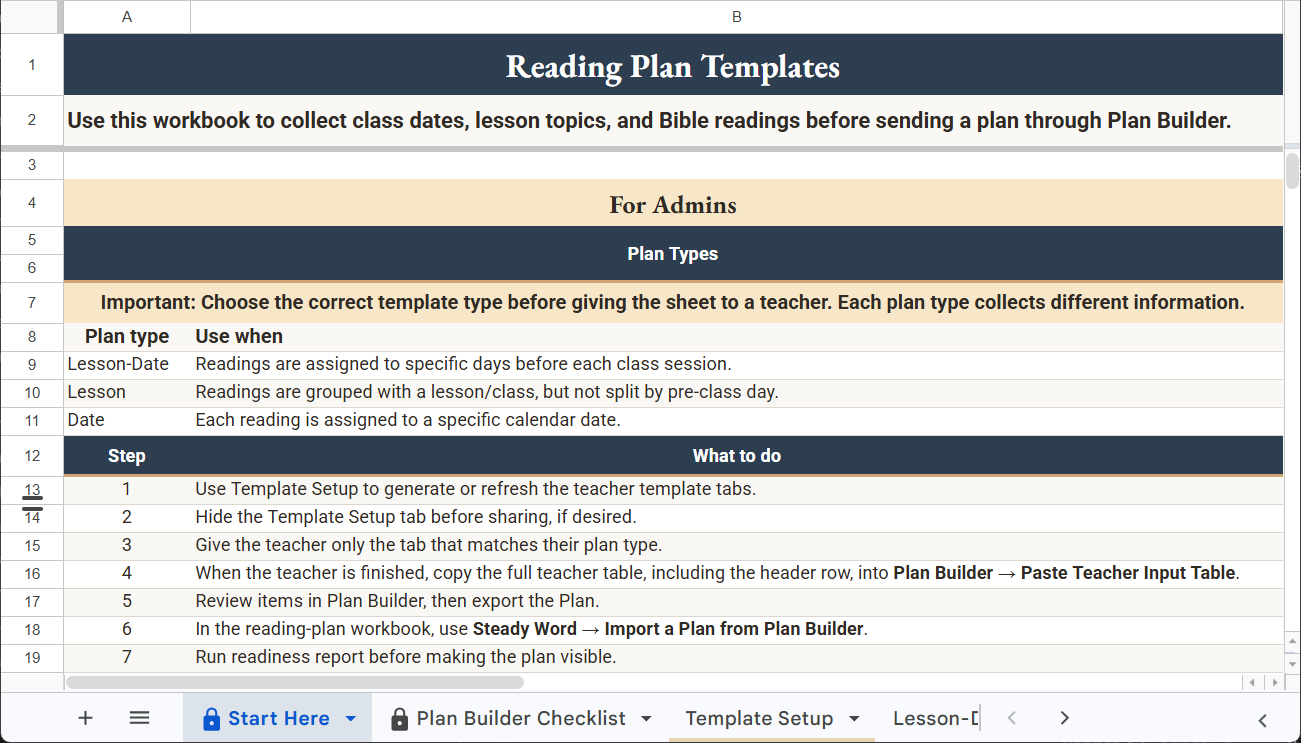
Start here before filling a plan. This tab explains the three plan types, walks through the full workflow, and points to the correct template tab for your class.
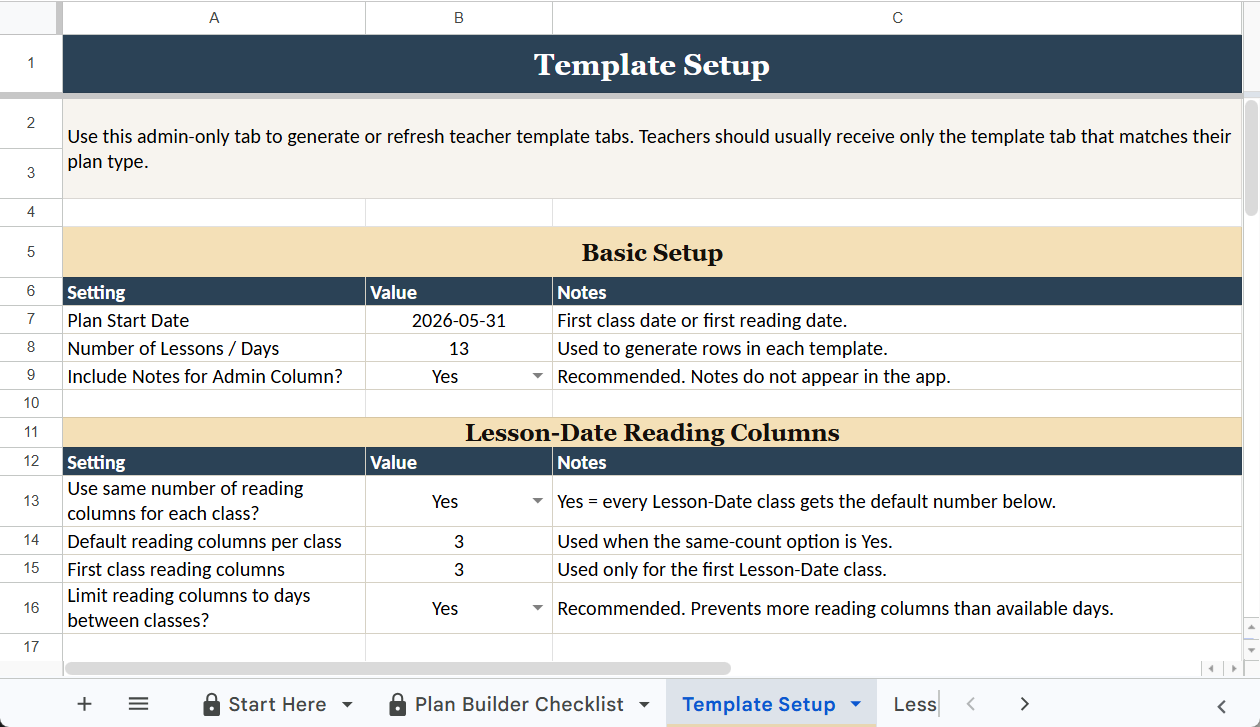
Configure the plan here before generating the teacher tab. Set the plan start date, number of sessions, and reading columns. Then use Steady Word Teacher Tools → Build all template tabs from Template Setup to generate the correct tab automatically.
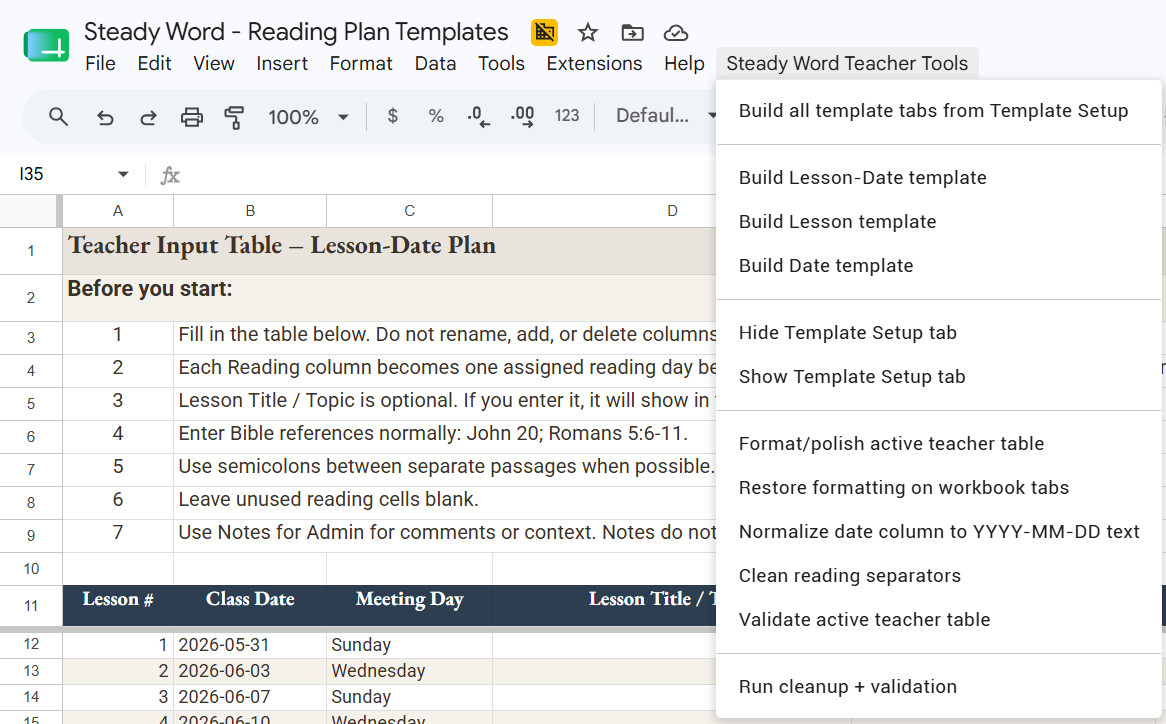
The Steady Word Teacher Tools menu handles setup and maintenance without manual formatting. Use it to generate template tabs, normalize date formatting, clean reading separators, and validate the teacher table before handing off to Plan Builder.
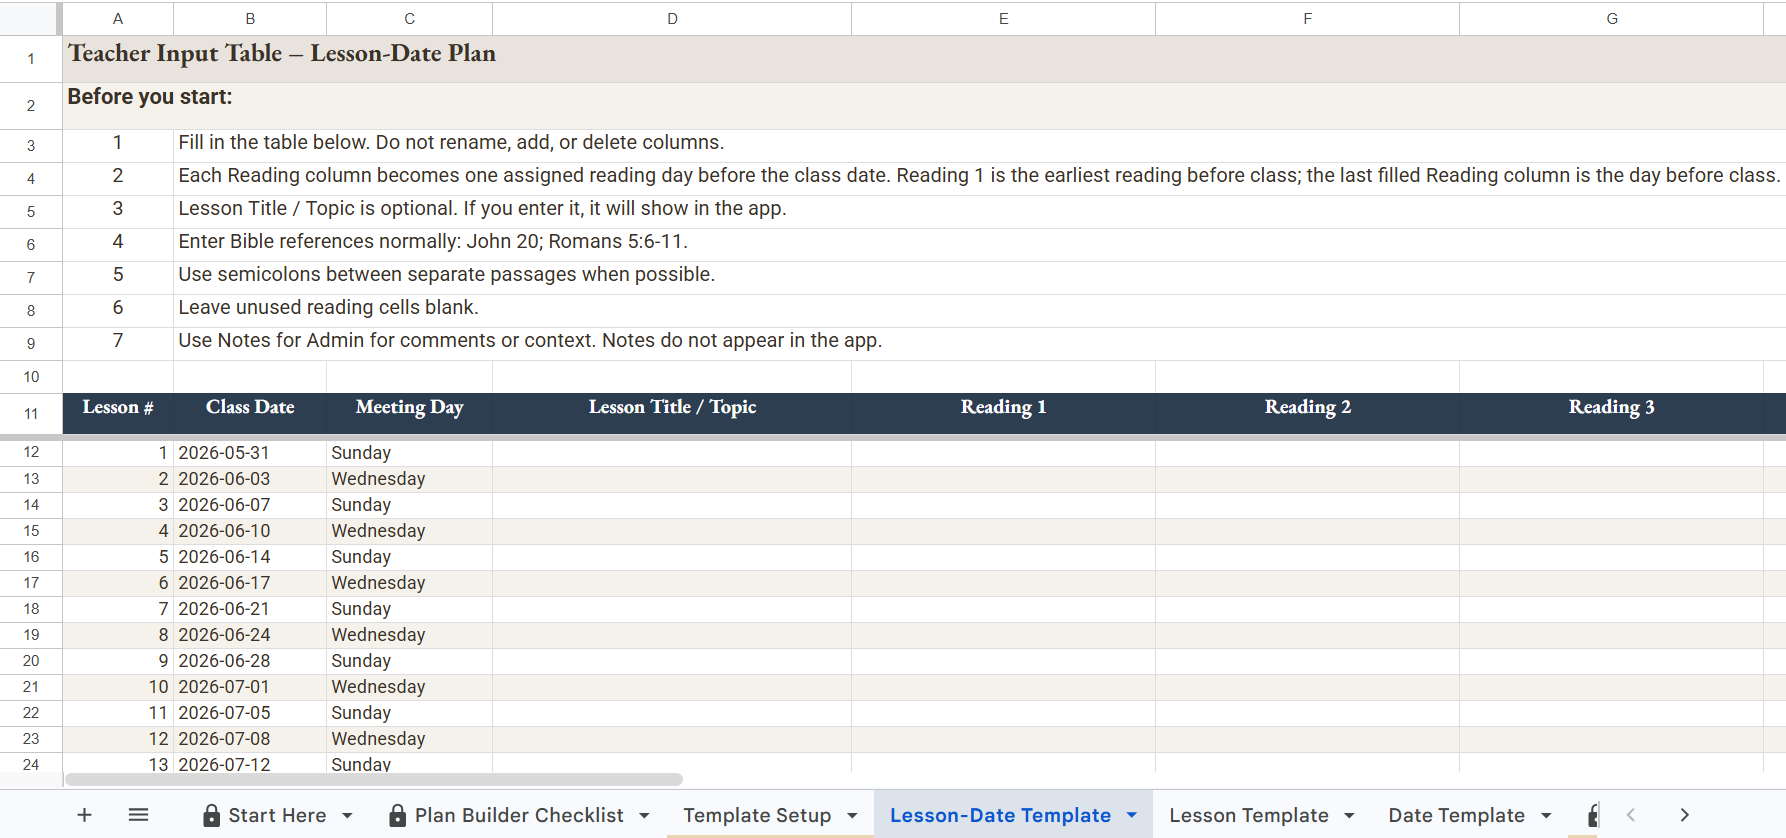
The teacher fills in only the highlighted cells: lesson title or topic, Bible readings, and any admin notes. Class dates and meeting days are pre-filled from Template Setup. Leave unused reading columns blank — Plan Builder ignores them. Admin notes never appear in the app.
The plan type must match across all three tools. If they don't agree, the import will not produce the right result.
- Lesson-Date — readings are assigned to specific days before class. Each Reading column is one day.
- Lesson — readings belong to a class session, but members can read them any time before class.
- Date — daily readings with no associated class schedule. Each row has its own date.
Plan Builder
Plan Builder takes the teacher's table and compiles it into the format the app needs. It normalizes Bible references, flags anything that needs attention, and publishes the plan straight to the Admin workbook's import tab — with copy and download available as a manual fallback.
Access Plan Builder from your admin link. You'll need your access code the first time.
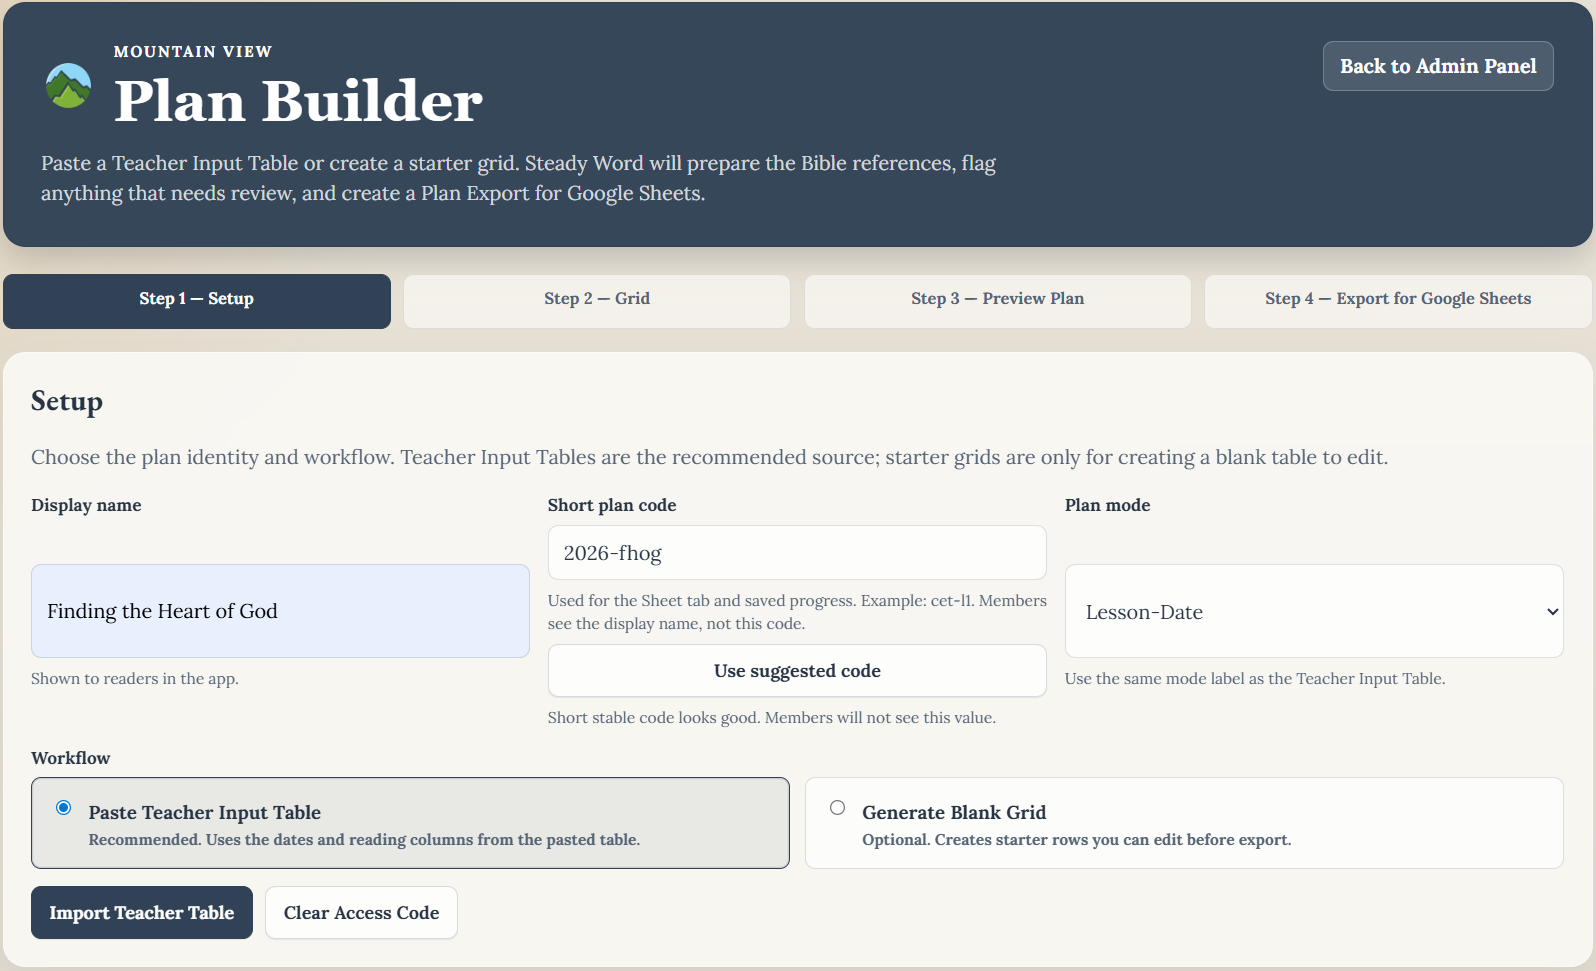
Start by filling in the plan's display name, short plan code, and plan mode. Choose Paste Teacher Input Table as the workflow — this is the recommended path for all plans that start from a teacher's table. Then click Import Teacher Table.
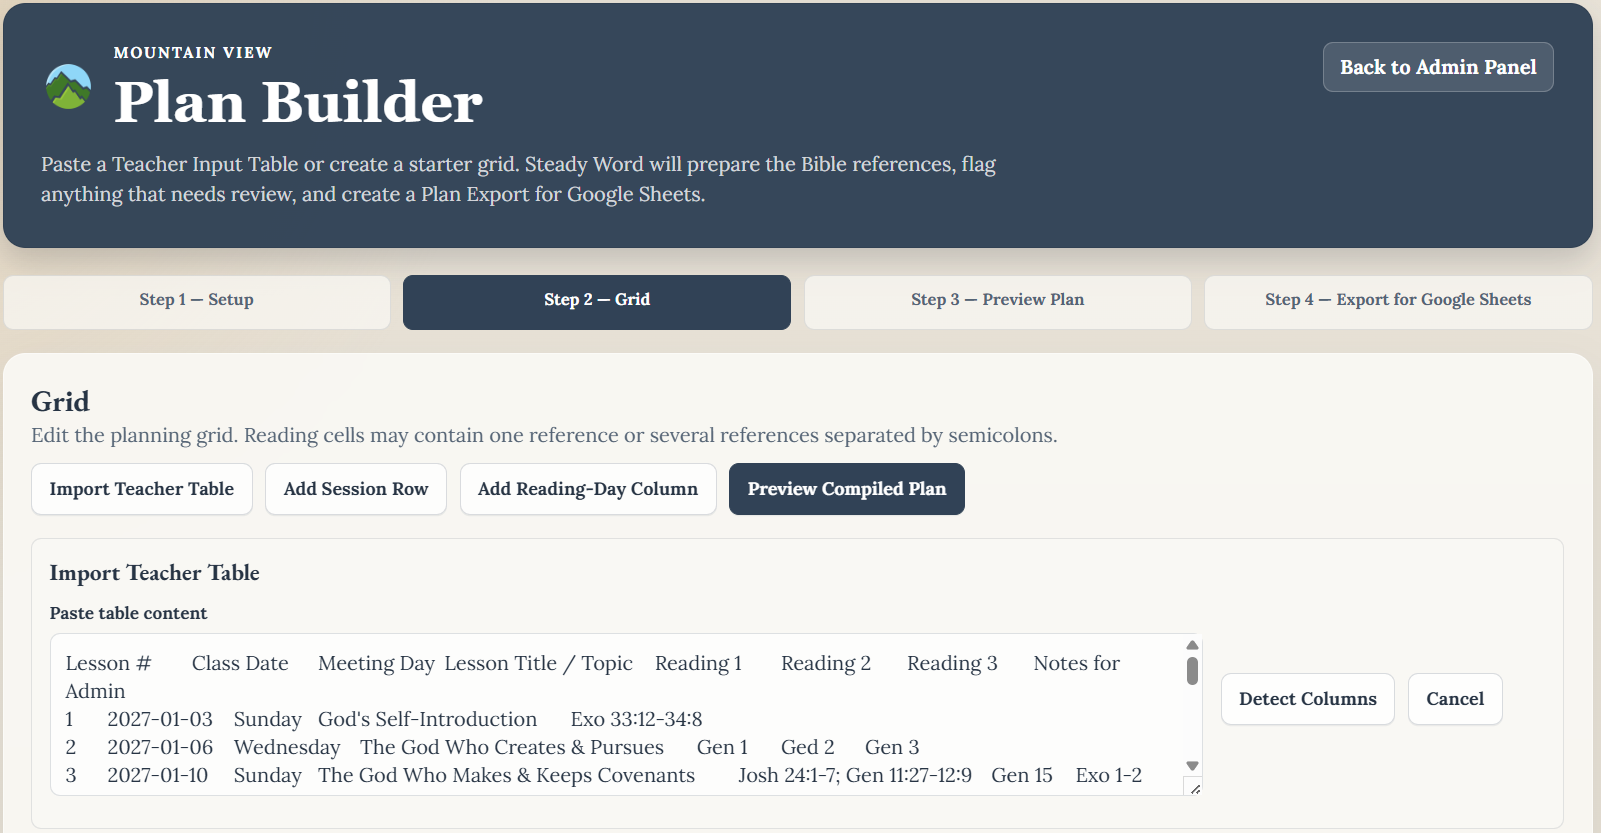
In the Reading Plan Templates workbook, select all cells in the completed template tab — including the header row — and copy. Paste into the import panel. Plan Builder maps the columns automatically from the header names and shows a preview of the pasted data before processing.
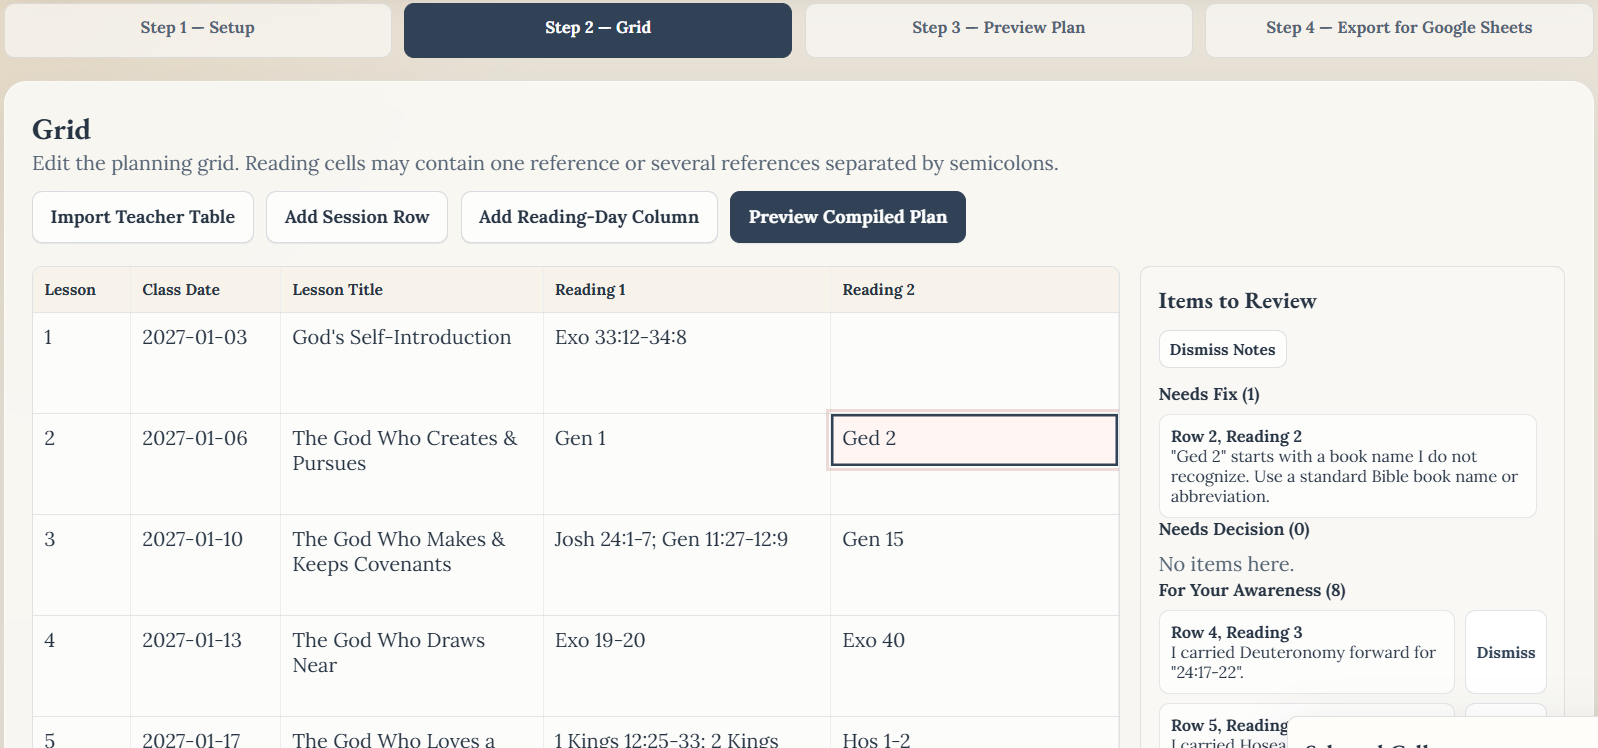
Plan Builder flags anything that needs attention. Needs Fix items — like an unrecognized book name or a date problem — block export until corrected. Edit the cell directly in the grid and the issue clears immediately. For Your Awareness items are informational and can be dismissed without action.
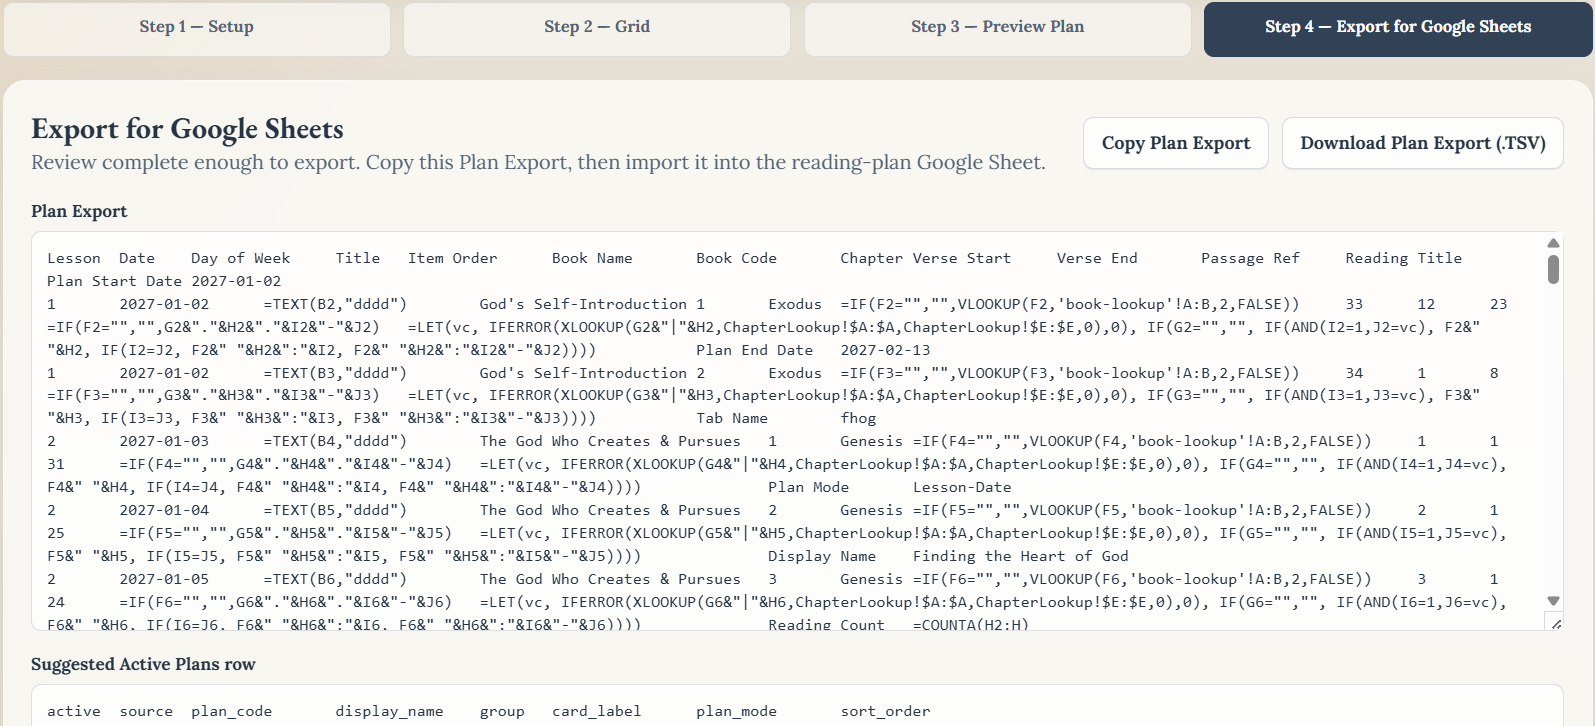
Once all blocking items are resolved, move to Step 4 — Export for Google Sheets. Click Publish to Google Sheet to send the compiled plan straight into the Admin workbook's import tab — no copy and paste. Copy Plan Export and Download Plan Export remain as an optional manual fallback if you prefer to move the file yourself.
Steady Word does not ask admins to hand-format app data. Teachers enter class information, Plan Builder compiles it, and the Admin workbook checks it before members see anything. The admin's job is review and approval — not data entry.
If a book name, date, or reading range looks wrong, Plan Builder flags it before export. Fix the cell in the grid, review the preview, then publish the plan only after blocking items are gone.
Reading Plan Admin Workbook
The Admin workbook is the publishing surface. It receives the plan published from Plan Builder, runs readiness checks, and controls exactly what members see in the app. This is the only workbook with a Steady Word menu.
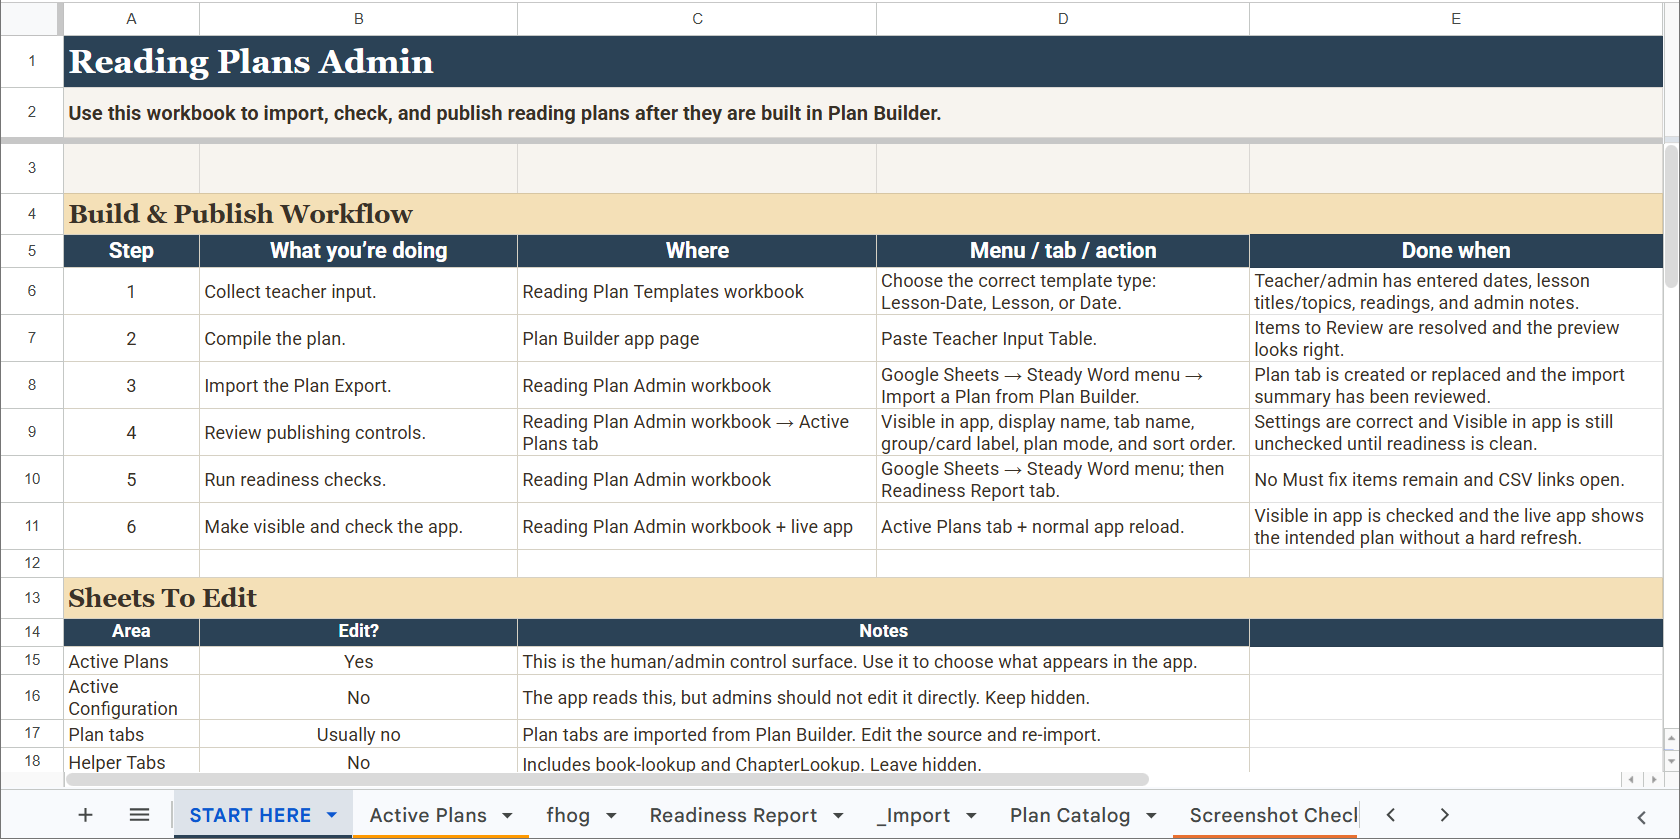
The START HERE tab lays out the publishing workflow and describes which tabs to edit and which to leave alone. Read it before touching anything else in this workbook. Active Plans is the only tab admins edit regularly.
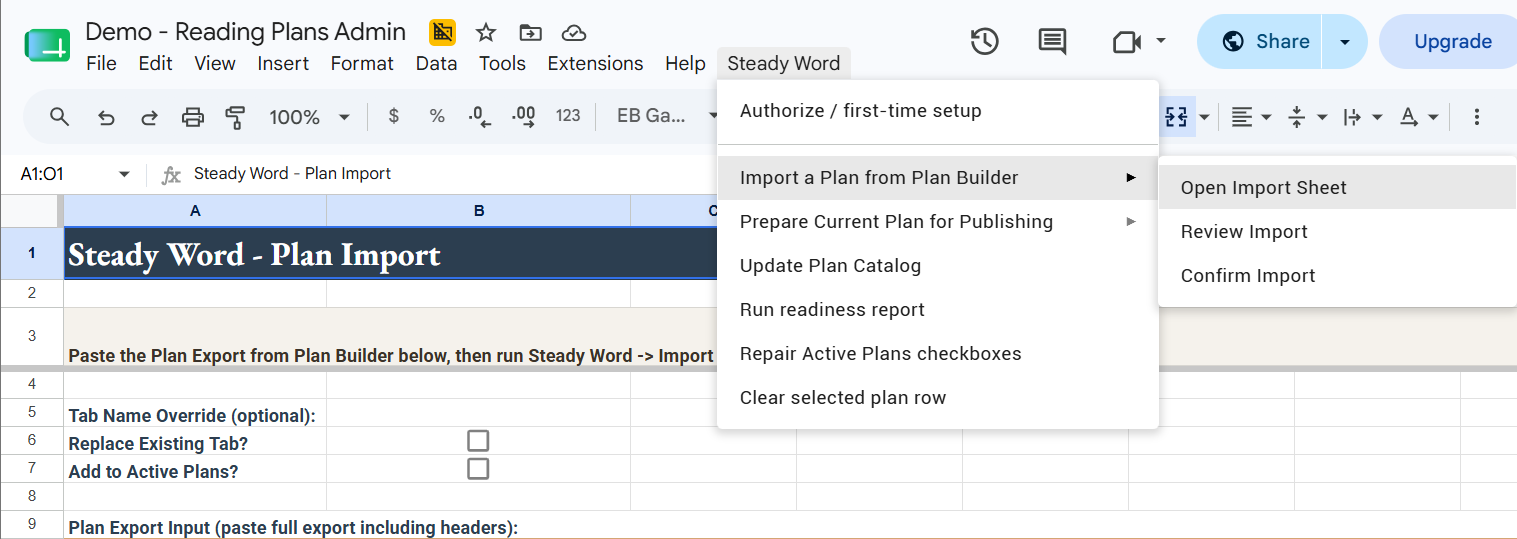
Go to Steady Word → Publish plan from Plan Builder. This one step reviews and validates whatever is staged in the _Import tab — normally sent there by the Plan Builder Publish to Google Sheet button, or pasted manually as a fallback — then builds the plan tab and writes the Readiness Report. You can set the tab name, replace an existing tab, or add the plan to Active Plans during this step.
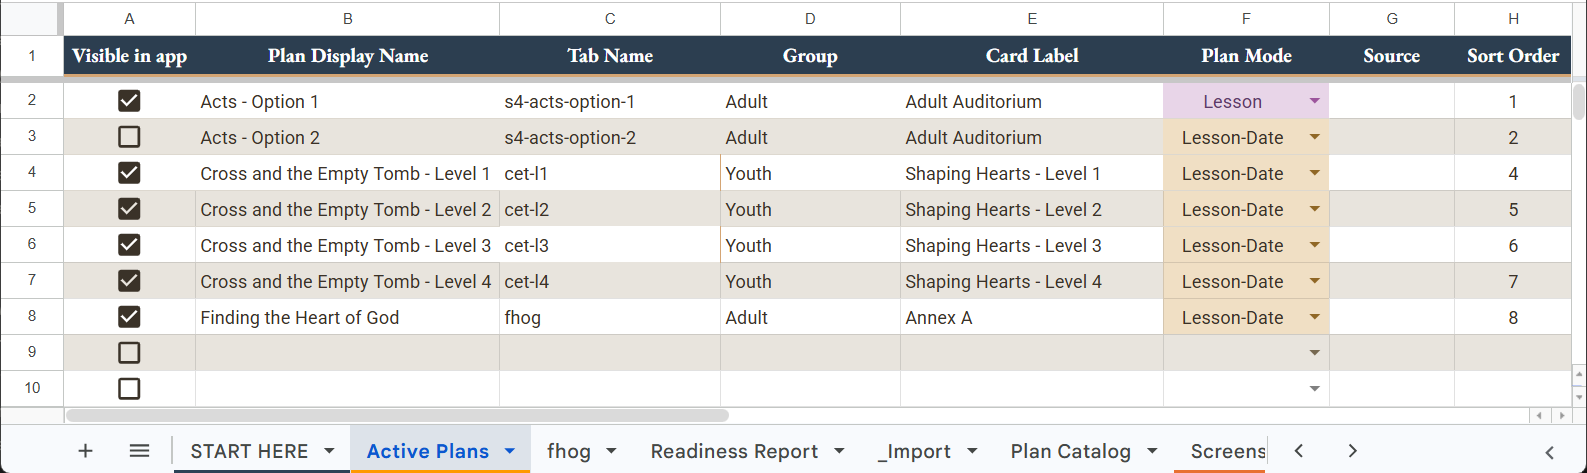
Active Plans is the tab admins edit regularly. Set the plan's display name, group, card label, plan mode, and sort order here. The Visible in app checkbox controls whether members can see the plan. Leave it unchecked until the readiness report is clean.
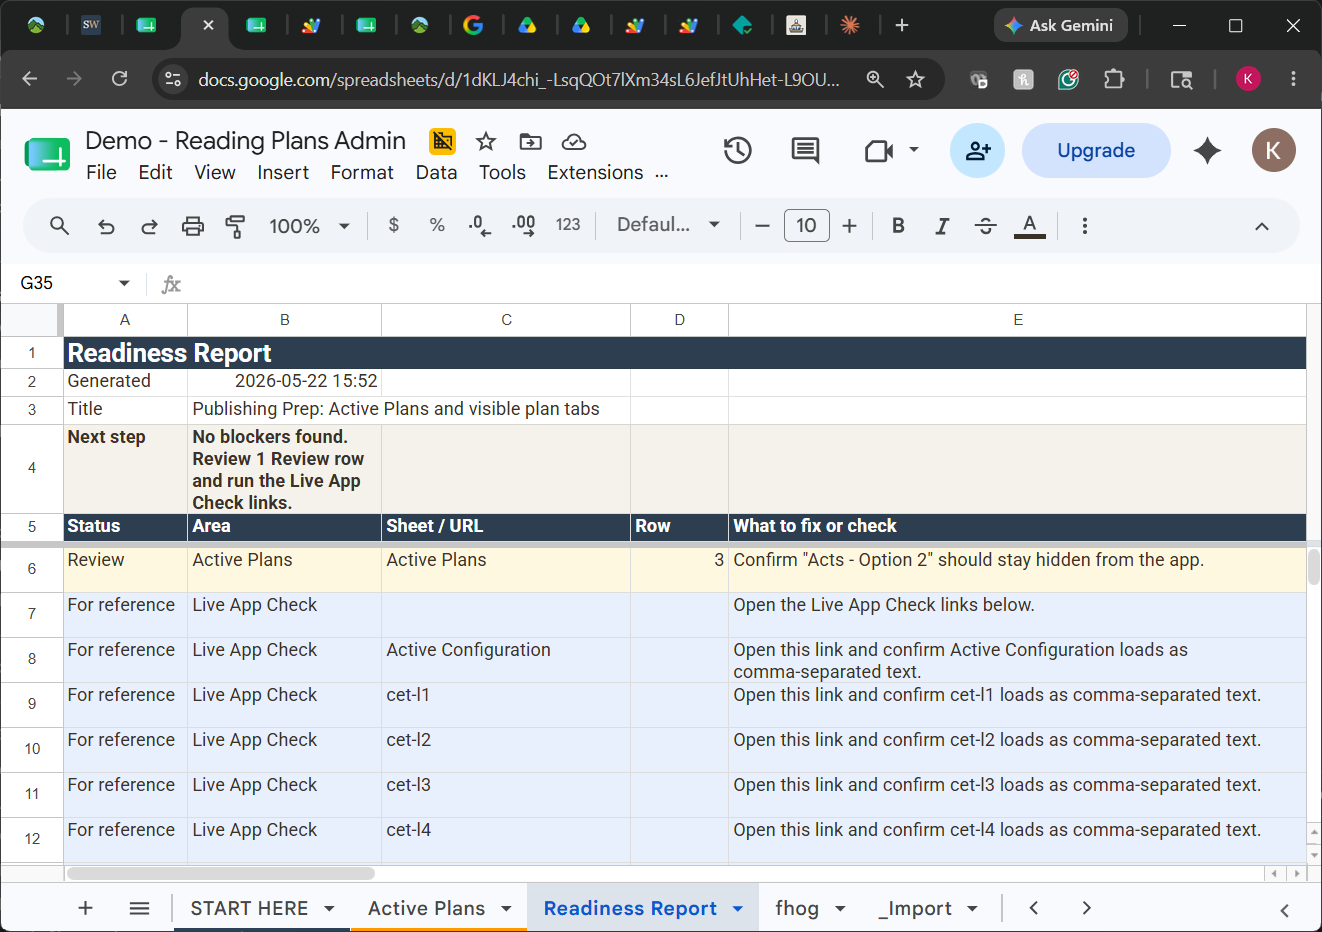
The Publish plan from Plan Builder step writes the Readiness Report automatically — check it here before making a plan visible. The report is the final quality gate. No blockers found means the plan is structurally ready. Review any Review items before launch. The Live App Check links let you confirm the app can reach each plan directly from your browser.
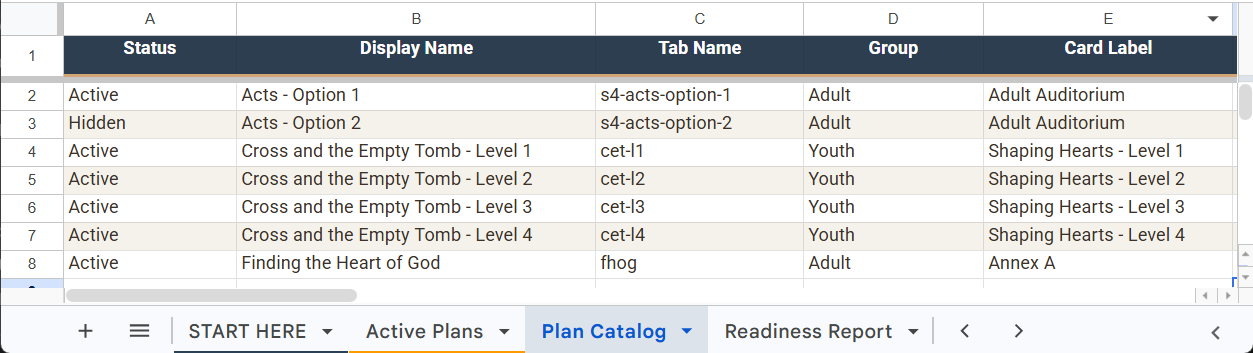
The Plan Catalog is auto-generated and tracks every plan tab in the workbook — Active or Hidden. Plans don't need to be deleted when a segment ends. Hide the tab, and the Catalog remembers it with its name, group, dates, and reading count. Use Steady Word → Update Plan Catalog to refresh it after any changes.
The Admin workbook lets you publish and review a plan before making it visible in the app. Leave Visible in app unchecked until the readiness report is clean.
A plan with a mismatched tab name or missing reading titles will appear in the app but show nothing useful to members.
- Always run the readiness report before checking Visible in app.
- Confirm there are no Must fix rows in the report.
- After making the plan visible, check the app with a normal reload. If it does not appear, rerun the readiness report to confirm everything passed.
What members see
Once a plan is visible, members see it after a normal app reload. Here is what to spot-check before announcing the plan to your congregation.
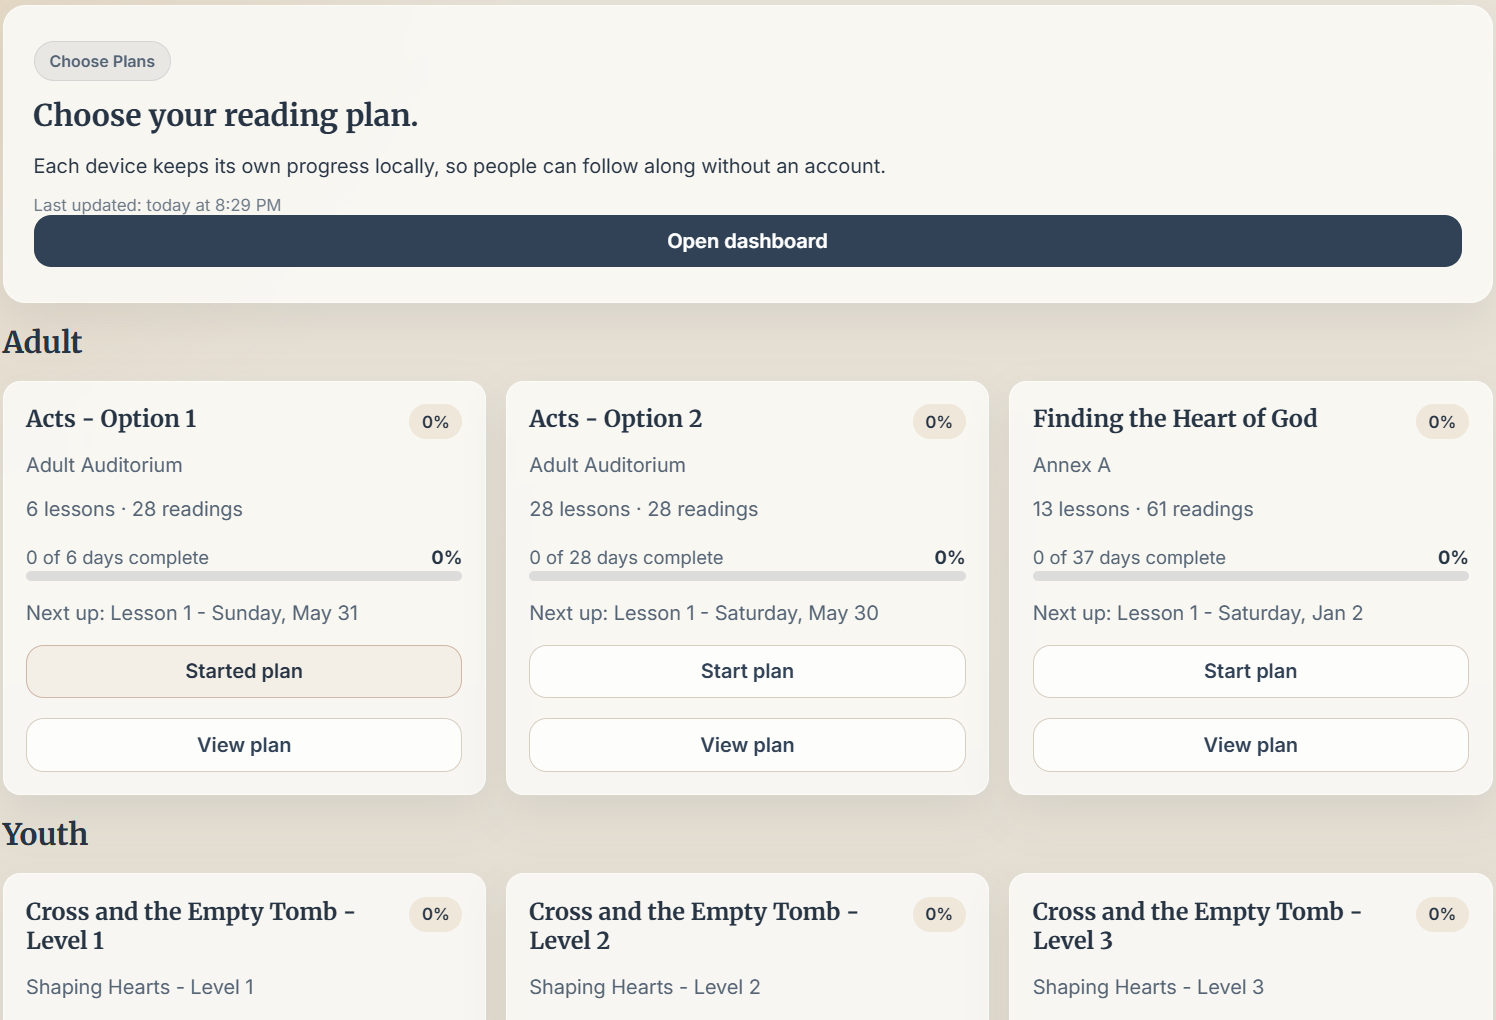
Confirm the plan appears in the correct group with the right display name and card label. Multiple plans are grouped and sorted by the order set in Active Plans. Members can start any plan independently — progress is tracked per device.
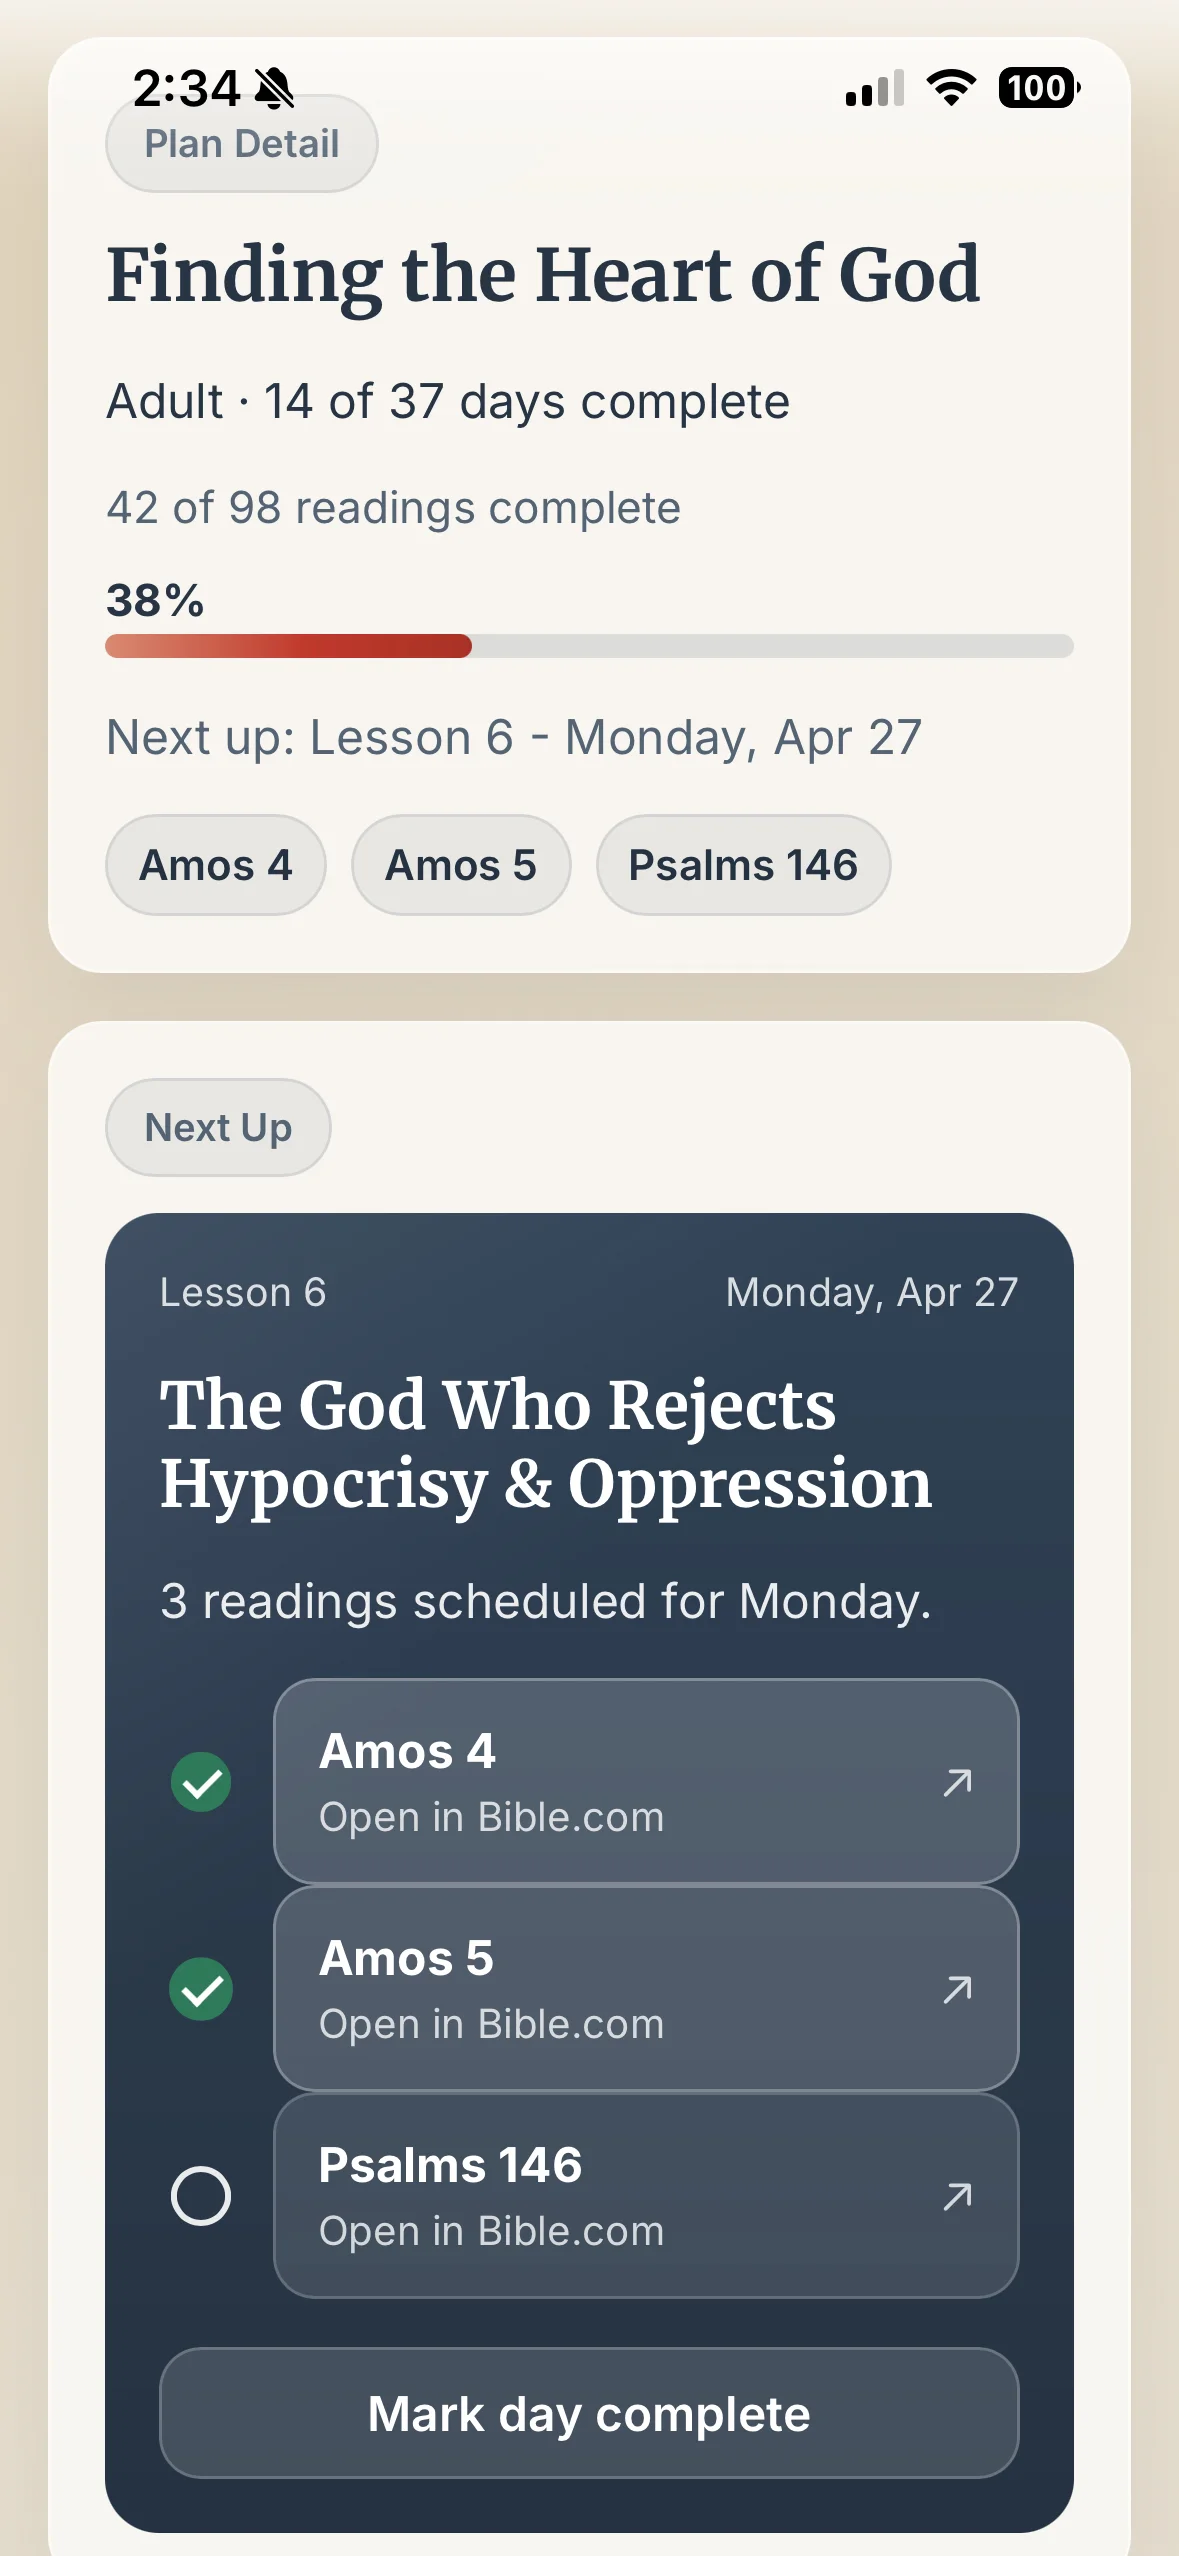
Tap into a plan and open a lesson. Each reading links to Bible.com. Spot-check a few readings — especially cross-chapter passages like Exodus 33–34 — to confirm the links open the correct text and the reading titles are right.
Getting help
For members who need help installing the app, or admins who run into something unexpected.
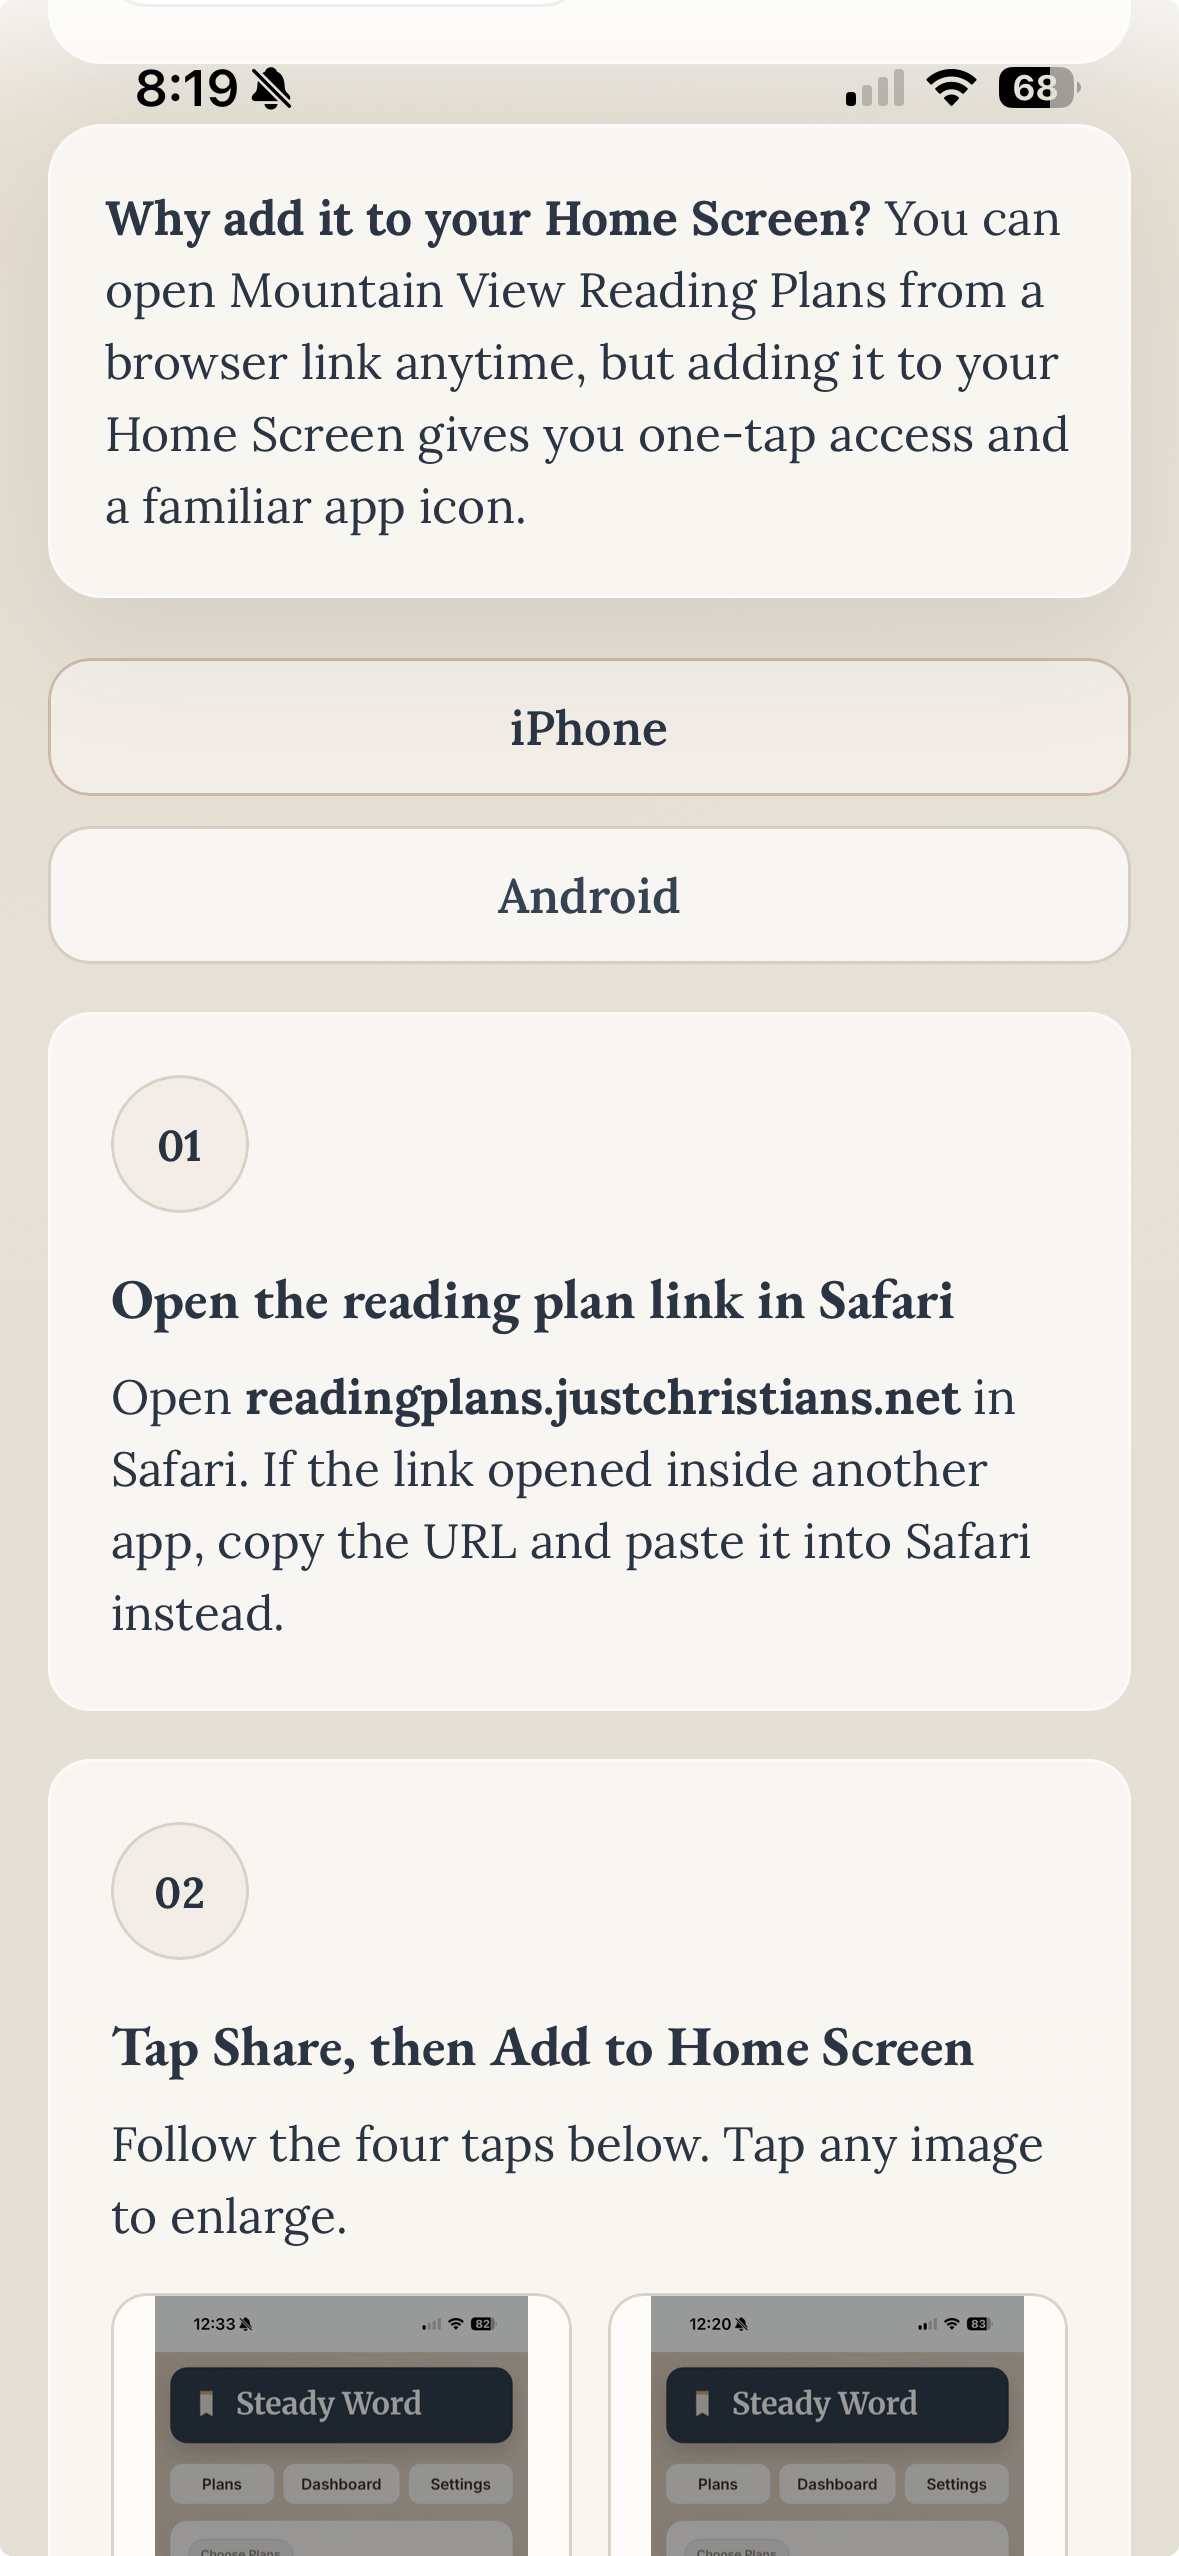
Share steadyword.com/install with members who ask how to add the app to their Home Screen. The page has device-specific steps for iPhone and Android, with screenshots for each tap.
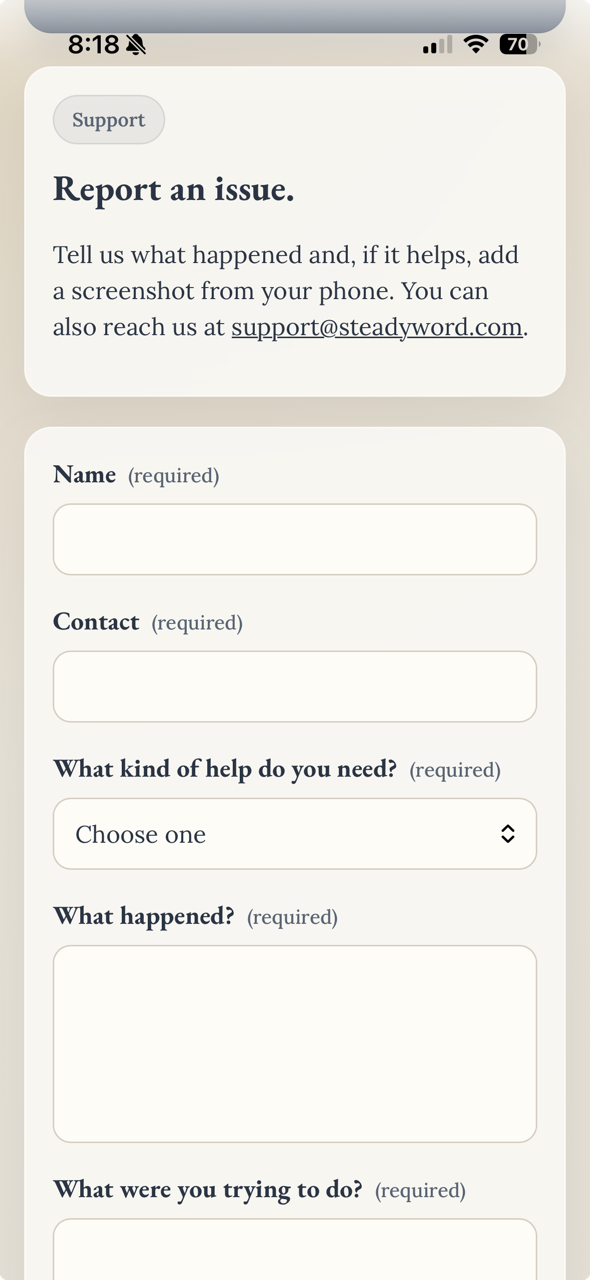
Members can submit a support request from the app footer. For admin questions about plan imports or workbook issues, email support@steadyword.com with the plan tab name and what changed most recently.
For members
Most member questions are install-related. Point them to the install guide or the support form in the app footer. The guide covers the common cases for iPhone and Android.
For admins
For plan setup, import issues, or anything workbook-related, email support@steadyword.com. Include the plan tab name and what changed most recently — that gets to a resolution faster than a general description.
Want this workflow for your church?
Steady Word can help set up the app, workbook, and first plan so your team can manage future plans with confidence.